

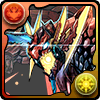
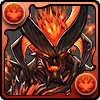
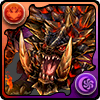
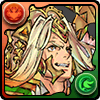
Living Character Highlight: Commanding Hibiscus Starfairy, Rosalyn

Living Character Highlight Series
Living character highlights mean they will be updated and noted when the last update was. Readers are welcome to leave comments or message the author directly. This keeps the highlight relevant for current content and players interested in the character as they evolve in the meta. Also, it lets us (Hyperion) rush a publish when a character is first introduced in case the content is time sensitive with the expectation that the highlight will continue to be improved. The order of information in these highlights will always be an fluffy introduction, general overview, team building suggestions and finally dungeon guides. Thank you Tsubaki Bot for the image card sources! Art and icons are owned by GungHo Online Entertainment, Inc.
Updated 2021, November 19th – Added Lumon’s MD1 Guide, embedded videos
Updated: 2021, October 7th – Added MD1 Template and 17-min clear video.
Updated: 2021, August 13th – Added Optimal (Gileon) build video.
Updated: 2021, August 4th – Changed guide to support the new optimal SR3 build with Gileon. Added clears by MantasticPAD and WetTheSystem.
Updated: 2021, August 2nd – Small corrections, and added more details to Fenrir Viz, Senri, Gremory and Grandis encounters for Shura 3.
Intro: Transform Meta & Starfaeries
Rosalyn is one of three new faeries in the Star-Twined Faeries event to break into the “S-tier” lead scene competing with Nautilus and Royal Oak. They are also part of the new double-transform trend that reduces the emphasis on massive amounts of skill boosts and challenges team builders to come up with creative ways to survive early floors in dungeons with shields, hastes and delays.
What are transforms? Transforms were introduced with Fagan Rai, and more notably, Fasca and Nelle and were a way to provide a potent 7×6 leader skill that would transform into a new card with a better leader skill after meeting the skill boost requirements. Other cards were introduced that provided very powerful team building tools such as Norza who had a ridiculously low cooldown of 2 turns to generate 3 water orbs, 3 heart orbs, an RCV buff and a time extend buff. The meta progressed with the introduction of Sin Dragons & Key Heroes (and later Mystics & Specters) by having uber powerful cards but extreme skill boost requirements to offset them (25-30 turns).
And then the submarines arrived…
Nautilus and Royal Oak progressed the meta with crazy scaling damage amp actives that also make their primary color orbs AND hearts on a two-turn cooldown. Not only that but they pack an incredible 4x effective HP (eHP). What’s the downside? You can’t (easily) transform them on turn 1 because they take two active skills to reach their final form. They were not the first cards to have this mechanic, but they are the first to have a significant impact on the meta. Nautilus and Royal Oak require 25 turns for first transform, then 6 to transform the second time. This emphasized packing large amounts of skill boosts and then you only needed a reasonable solution to survive the remaining 6 turns.
Rosalyn, Natsuru and Phillis have flipped that a bit. They provide absolutely nothing in their first form, but they take a measly 12 skill boosts to transform the first time. However, you are stuck with an awkward 10 turns before reaching your full power and survivability! The first transform leader skills are luckily just serviceable in end game content. This can be very challenging to team build for as the meta is still mostly influenced by the era of Sin Dragons & Key Heroes and Mystics & Specters where cards were tuned to have huge amounts of skill boosts that now are mostly wasted on the new fairy teams.
All Things Rosalyn


PROS AND CONS
PROS
- 11.11x eHP (91% shield) with self-pair.
- All eHP is through shield, so immune to gravities and has 11.11x eRCV as well.
- No need for RCV solution if bringing a heal-stick. Heal-stick isn’t even needed except for the most difficult content.
- Shield is activated by hitting 9C and does not have a color matching requirement.
- Active skill scales of fire combo enhance (takos) awakenings and thus double-dips for insane damage. (Think Nautilus.)
- Rosalyn synergizes well with all kinds of damage approaches: combos, rows, VDPs, Ls and even crosses!
- Rosalyn easily damage caps off of just doing combos, so her VDP awakening is a very nice option just for dealing with annoying void shield spawns.
- Built-in 7×6
CONS
- Mediocre attack multiplier: 256x with self-pair
- Bindable in all forms
- Does not provide skill bind resist
- Awkward 10-turns of weakened leader skill after first transform.
- Failing to hit 9C is instant death in almost every situation.
- Damage controlling can be hard due to red combos scaling VERY quickly.
- Her active does not make hearts.
- Weak to full heart board and full red board changes which do exist in the current meta: Senri, Parvati, Wisp.
TEAM CONCEPTS
Rosalyn is a combo-based leader relying on a flood of red orbs from her fire skyfall buff. Her team should stack red combo enhance (tako) awakenings to scale her active skill and improve her damage output. Common team templates damage-cap Rosalyn with just 3 red combos, so players should practice conserving excess red orbs. Most team templates cannot afford a heart generator so players should also learn what hit combinations they can survive through and conserve heart orbs as needed. Players will be challenged to survive the 10 turns in between the first transform and second transform.
For most content her sub-pool is very versatile, but extreme requirements and lack of some JPN only options limit her team building for new dungeons like SR3.
Below is a list of cards fulfilling various sub archetypes. This doesn’t cover all archetypes, most notably passive damage support (red takos, red rows, etc). You can easily filter passive damage support cards in PADDB or Ilmina.com. If you see cards with good passive awakenings on the lists below that means they have that double value (or sometimes triple if they are in multiple lists) for covering multiple roles.
Asymmetric Pairings


Damage Dealers


Mechanics Coverage


Shield Actives


Critical Assist Equips


Team Templates
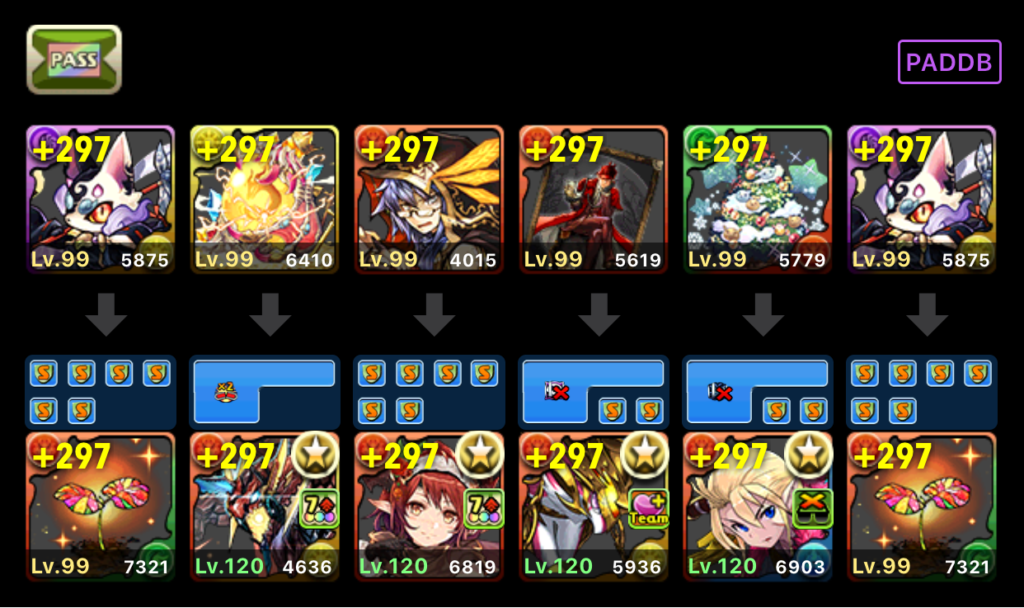
Rosalyn MD1 Build (Can struggle with Blue Albrecht)
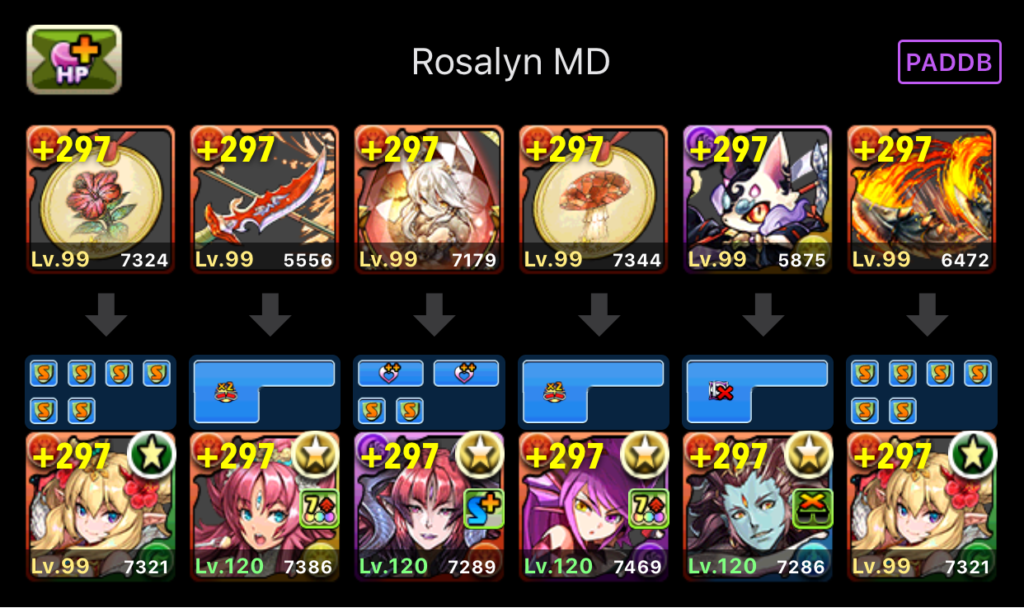
Rosalyn SR3 Optimal Build

Low-Cost Team Build for General Play
Dungeon Guides
MD1: Dimension Guide
WetTheSystem – 17 Minute Clear
Shura 3: Stellar Stage of the Supreme
Old Guide not running Gileon can be found here: Rosalyn SR3 No Gileon
This dungeon guide assumes you are using the optimized Gileon build. Deviation from the build will need to re-evaluate damage and HP checks. HP Checks are noted in RED.
Comment on 2 double-damage cap cards: All of the calculations done are based on a single double-damage cap. Several floors have potential to troll you with 2 double caps, and so it is best to not even waste the resources. With good skyfall luck it will save you at MOST 5-6 turns.
Floor 1: Baby Carbuncles
Have ~fun~ occasionally being trolled here. You need to stall at least 2 turns here, but preferably 3+ turns, and sometimes skyfall doesn’t care. Focus down the dark carbuncle, then focus the blue one. Do not mass attack under any circumstances until Misty Rain on Belial is ready for F2 (and the Dark and Blue carbuncle are dead). Keep cascading to a minimum and break up pairs left on the board. You can use Misty Rain this floor if you screw up, but it makes F2 very difficult. If you DO need to use Misty Rain you must stall on F1 until Rosalyn is transformed. Gileon gets bound here, but it does not matter.
Floor 2: Golems
Use Misty Rain to delay and clear debuffs. Attack hard until you break super resolve. The suggested approach is mass attack until all 3 super resolves are broken. Saving for one turn to hit more combos the next turn is dramatically more damage efficient. You must kill one golem if you have 63521+ HP, and both of the outside golems if you have less than that. The optimal build does NOT have enough HP to survive 2 golem strikes so kill both of the outside golems. It is possible to get here early enough that you cannot transform before the center golem executes you. In this case you have to go hard, save up red orbs on the board because you will need to rely on red tako scaling to clear the golems.
Floor 3: Evil Death Dryad
Dryad Skip Strat:
64,935+ HP is required for this strategy to survive the Dark Knight preempt of F4. Kill this floor in two turns. Mass attack fire plus one additional combo is usually enough, and 3 total red combos is always enough. Save extra red orbs to avoid orb troll since your board is flooded with unmatchable hearts.
Non-Skip Strat or Late Transform:
Use Belial to clear heart unmatchable, then do minimum damage possible to attempt to stall Belial up for the next floor. You can survive one turn on the next floor so you need to spend at least 4 turns here. (Two hits to kill dryad, 1 hit to knock one puppet golem, 1 hit to knock other puppet golem, 1 hit to kill puppet golem, 1 hit to kill other puppet golem = 5 turns).
Dryad has red absorb:
Don’t forget to dump Rudra, or he will over charge before Minerva/Parvati. Clear heart unmatchable with Belial, target the dryad and carefully keep yourself alive. You can’t easily control red skyfall due to Rosalyn’s skyfall buff, so this isn’t often successful. If you happen to mass attack at this point consider using Boar Head to potentially save the run. If you do have to use Boar Head then stall as much as possible. On the Dark Carbuncle floor (F6) kill the Flamie, then very carefully single target the Bubblie. As long as you don’t deal too much damage you will not break the Bubblie’s defense and can stall the turns needed to get Boar Head back up.
Floor 4: Swordsmen
Use Belial to clear the F4 awoken bind AND F3 heart unmatchable. Clear when ready. For spinners, target the blue knight and prioritize heart TPA and 2 red combos. Gileon comes up around this floor. Do not forget to transform to take advantage of him.
Floor 5: Big Carbuncles Part 1
Trivial. Clear when ready, and mass attack so you don’t forget to kill them within 1 turn of each other.
Floor 6: Big Carbuncles Part 2
Your Boar Head will get delayed 2 turns. Use these 2 turns to hammer down the Flamie and Bubblie with single target damage. Do not mass attack. You must hit hard with Lakshmi to knock down the Bubbly, so do not hold back once you are going for the kill on the dark carbuncle.
Floor 7: REMDras
Optimal build runs a leader-swap latent awakening. Your HP with Leader Swap Resist must be 58,447+ to survive Diamond REMDra. If you are shielding check with your swapped lead that your eHP is 649,401+. Delaying works well too if you can fit it. The old build linked at the start of this guide used Misty Rain.
Floor 8: Parvati -or- Minerva
Parvati:
If you have 2 Double Damage Cap Latent cards that can hit 4B then use Rudra (who also clears the RCV debuff from Parvati) and kill in one shot. This requires a very good board (~5 red combos) to get enough damage out of Rudra, but it’s possible to conserve orbs from the previous floor. Otherwise, use Rudra and do 1 heart TPA, 2 red combos and one other combo. DO NOT CASCADE ANY ADDITIONAL COMBOS. Parvati damage control is 100% consistent because she gives you 10 turns of no skyfall. Alternatively, it is possible to get a ~40% hit with a red VDP + 1 red combo if your only VDP subs are Rosalyn, but make sure you can survive Parvati’s 0% RCV debuff (via NY Horus or Wedding Trailo buffs).
Minerva:
Do not try to one shot Minerva. Follow the same 2 turn strategies used on Parvati for Minerva.
Floor 9: Tsukuyomi -or- Andromeda
NOTE: This is the last floor that you must make sure you do not have any residual jammers or poison orbs for any reason. F10 Ameno will execute you if you have hazards on the board. Also try to save 4 hearts leaving F9 to prepare for Baldin and recover from Belial self-nuke.
Tsukuyomi:
3-4 red combos one-shots Tsukuyomi. 3 red combos is a bit close. 4 is absolutely safe.
Andromeda:
3 red combos twice two-shots. Trivial floor.
Floor 10: Ameno -or- Baldin
Ameno:
3 red combos twice two-shots. Trivial floor unless you get trolled by orb locks. Save extra red orbs past 3 combos and do not try to one-shot because it’s not possible. Make sure you dump Belial.
Baldin:
Clear awoken bind with Belial and use your hearts you saved from the previous floor to recover. 3-4 red combos three-shots. You might get squeamish on Baldin if blind skyfall from Tsukuyomi is trolling you. You can carefully stall with 2 red combos plus 1 more combo and stay under Baldin’s 1M defense. You can optionally manually 9C for your shield, but some accidental red skyfall will quickly end you.
Floor 11: Gremory -or- Grandis -or- Ilm
NOTE: F12 has Senri. If you are using Dark Lakshmi/Akantor/Gileon make sure you are prepared (use Dark Lakshmi premptively -or- make sure your board change is ready).
NOTE: F12 has Dark Metatron, and you will need to use Belial or Mushroom equip to survive the heart unmatchable.
Gremory:
Absolute nightmare if you don’t have a readily accessible time extend. She’s dies easily, but if you don’t have a great board (enough to hit 2 double damage caps) you will just put her into the execute range. 3 red combos twice two-shots her. Clearing the time extend is optional, but it really makes the next floors harder. Gremory into Albrecht is terrible, so be ready for that. If you are using Dark Lakshmi to overwrite the time extend it is safer to use her on the second turn to lock the board in preparation for Senri.
Grandis:
Free. Blow his home up with double cap hit. If you’re screwed on red orbs use Lakshmi here to make some extras. It takes 3 red combos and a total of 14C to break Grandis’s defense with Lakshmi. Note it takes 3 red combos and a total of 16-17c to consistently hit double cap on Lakshmi. You can also survive Grandis hits if you have Lakshmi shield active.
Ilm:
Use the spinners to overcome the full light board. Wait until the orbs are red/hearts and use Rosalyn active, then swipe a TPA of hearts out of the spinners and solve the reds. If you can fish another red combo you can trivialize the damage calculations on this floor because 3 red combos twice two-shots. Be careful attempting to one-shot as his 16 billion health pool is the perfect range to troll yourself into an execute even with two double cap hits. He’s trivial except for spinners.
Floor 12: Senri -or- Albrecht -or- Fenrir Viz -or- Dark Metatron
Note: Make sure to check Belial/Misty Rain cooldown, because Belial must be available for <50% on F14.
Senri:
If you’re using Wedding Trailo or NY/SR Horus then swipe and pray. The best way to fix this is to run Akantor (shield+board) or Gileon. Another good alternative is using GH Dark Lakshmi on the previous floor to lock your board and save yourself some orbs. Clean three-shot even with 2 double capped cards. It is possible to knock Senri into execute if you attempt to 2 shot her and you don’t hit cap on Rudra both times. (So don’t try it.)
Albrecht:
His mechanics are annoying, but just overcome his mechanics and two-shot him in between awoken binds. 3 red combos twice will two-shot him, but its very close. 3 red combos when he’s light attribute hits him for ~10M with 16ish total combos. It’s safer to do 4 red combos for the second hit.
Fenrir Viz:
Free. Two-shot him below 50% using 3-4 red combos, then do a red VDP + 1 combo to finish him off. Be careful with 2 double caps subs and attempting to two-shot him, because if you are running one sub that deals no damage (like Belial) you will certainly push him into execute range.
Dark Metatron:
Free. Use Belial to clear unmatchable status. 3 red combos twice two-shots. If you have 61,975+ HP you can safely wait one turn to use Belial if you do not have enough hearts on the board to heal from the Belial self-nuke. If you made a mistake and let Misty Rain over charge you’re going to be forced to use Mushroom here if its up. If neither is up yet you do get ONE free turn on the next floor (no preempt) and another if you can one shot F13, but its not likely because your board will probably start to flood with hearts.
Floor 13: Raphael 🙁 -or- Gorfeis -or- Gorkaos
Raphael:
Free with the optimal build, but scary without a way to guarantee 4 red combos. Use Gileon or Lakshmi to get you up to 4+ total red combos and destroy him. Consider saving orbs on the previous floor if possible, to plan for Raphael if you won’t have an active ready.
Gorfeis/Gorkaos:
Mostly free because neither has red absorb but can take 4 red combos to get a good hit unless you full combo the board. Be aware that sub attribute pings will prevent you from killing him through his resolve. They don’t have HP based executes so don’t worry about it too much.
Floor 14: Kyonzansai -or- Ryuunsaai
Use Rudra ASAP and hit as hard as possible. Keep in mind the blue one will make red unmatchable below 50%. Clear unmatchable with Belial with the blue one and make sure you save a heart combo when knocking him below 50%. Chip down any remaining HP. These don’t have HP based executes either, but they do have Turn-10 executes so don’t hold back. Even with Rudra active and 4 red combos you only hit for 6-7B (a little over 20%). You will often need to VDP to reliably get good hits without Rudra’s active. You can ALMOST two-shot the red dragon with 4 red combos twice, so you can easily chip him down once Rudra active is gone.
Floor 15: Light Hexazeon -or- Dark Hexazeon -and- Augites
Augite 10th turn w/3 revives: 64,459+ HP
Notable health check with 50% shield active: Light Hexazeon 50% execute – 46,053+ HP
Kill Light Augite then mass attack and kill both then mass attack again and kill both. If the green one trolls you take your time a bit and try to get the final kill on them at the same time. Dark Augite easily dies. At any point during the augite phase burn your Misty Rain on Belial if it over charged if you are against Dark Hexazeon to prepare for his awoken bind. Otherwise save Misty Rain for its nice time extend/RCV buff or use it if you are cutting close to the 10-turn augite pseudo-execute. Optimal build has enough HP to use Lakshmi (Gileon brings big HP), but most teams will need to use a bigger shield like Mushroom equip. Use the shield at about 75% (if its a 5 turn one) on Hexazeon and begin burning him down hard. That means if your shield is not up you must combo conservatively but still manage to farm hearts onto your board (which can be very luck-based). If you get Dark Hexazeon make sure to save a heart combo if possible so you can heal from the self-nuke. Otherwise, you must attempt to survive the next hit after the awoken bind. Get him low and begin conserving a few extra red orbs per board or prep our Gileon when he is getting near the kill zone. Wait for him to turn green and blast him with a 5+ red combo hit to finish him off. Having two damage cap cards here really pays off, but being able to cap or nearly cap the Rudra with a Gileon active is just as good. With only one double damage cap 4 red combos hits Hexazeon when he’s green attribute for 6.5% (vs a 7.5% hit with 2 doubles). 3 red combos hits for about 6%. Damage can be significantly less without the color advantage, and its abysmal at blue (capping out at a 3% hit which is only 1% above his execute).
Great guide over all but I think there’s a mistake in the Shura3 team? I think you have the Imp. RCV++ latents on the Belial but its only at 110 which shouldn’t be possible because the newest set of latents require the base card to be super limit broken??? Not 100% sure but I think this might be a mistake?
You were probably right, but the RCV doesn’t really matter. She’s overkill with either latent awakening.
Amazing guide! Congrats for sure. I am wondering if you are still working on this and will include more information for AS2/Shura 2 when using Rosalyn x Rosalyn, as that is where I am currently stuck.
In the asymmetric parings list, did you mean 7343 instead of 7434?
Thanks for the catch!